Gluten Free Vegan Falafel

1 can chickpeas (drained)
1/2 large onion, roughly chopped (about 1 cup)
2 tablespoons finely chopped fresh parsley
2 tablespoons finely chopped fresh cilantro
1 teaspoon salt
1/2-1 teaspoon dried hot red pepper
4 cloves of garlic
1 teaspoon cumin
1 teaspoon baking powder
4 tbsp almond, quinoa or coconut flour
3 tbsp to ½ cup corn flour/meal
1 cup coconut oil
Chopped tomato for garnish
Diced onion for garnish
Diced green bell pepper for garnish
Tahina sauce

  1. Place the drained, uncooked chickpeas and the onions in the bowl of a food processor fitted with a steel blade. Add the parsley, cilantro, salt, hot pepper, garlic, and cumin. Process until blended but not pureed.
  2. Sprinkle in the baking powder and 4 tablespoons of the almond flour, and pulse. You want to add enough corn flour so that the dough forms a small ball and no longer sticks to your hands. Turn into a bowl and refrigerate, covered, for several hours.
  3. Form the chickpea mixture into balls about the size of walnuts or small patties, or use a falafel scoop, available in Middle-Eastern markets.
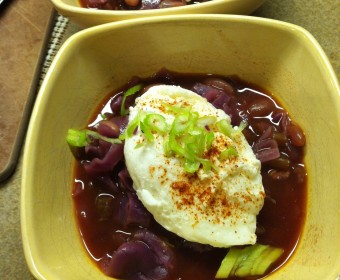
  4. Heat 3 inches of oil to 375 degrees in a deep pot or wok and fry 1 ball to test. If it falls apart, add more corn flour/meal. Then fry about 6 balls at once for a few minutes on each side, or until golden brown. Drain on paper towels. Garnish with chopped tomatoes, onion, green pepper, and pickled turnips. Drizzle with tahina thinned with water.

Kale, Pineapple, Mint Green Juice

This is an awesome sweet, spicy, and healthy juice that could be a great breakfast pick-me-up. Simply throw all the ingredients in your juicer in the order shown below. To make things easy, you can mix the kale (or your choice of dark green), parsley, and mint in a colander and throw them all in at once.

Photo Jan 26, 12 00 13 PM
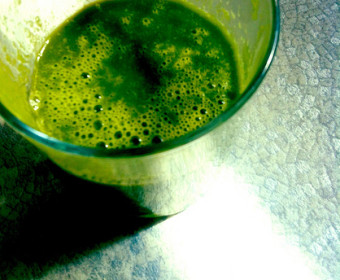
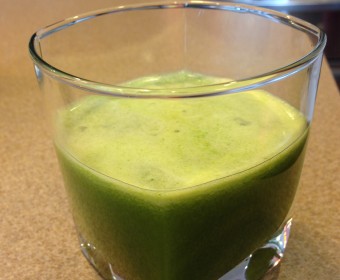
10 – 12 oz fresh pineapple – cut into chunks
5 – 6 oz cucumber (usually half of the English variety)
1 lemon – peeled, quartered
1 large apple
2 oz ginger
1 bunch Kale, Spinach, or any dark green
1 bunch parsley
1 oz mint leaves

Makes about 16 oz.

Grilled Cauliflower “Steaks” with Spicy Lentil Sauce

This meal was a knock-out. Everyone in our family gobbled it up. Who knew we’d enjoy cauliflower so much! I think it’s because it was relatively easy to put together, and we felt so good after eating a grain-free, vegan meal. Sure, our family eats meat regularly, but you don’t need meat every day. The book, Forks Over Knives – The Cookbook by Del Sroufe, was the source of this recipe. Many dishes in this book are a wonderful base, but some, like this, need an extra culinary “push” to make them truly amazing.

cauli-steak-lentil
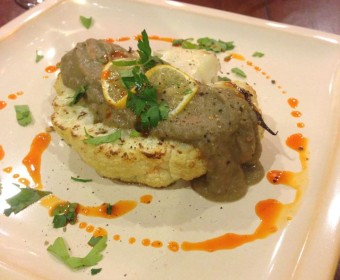
2 medium heads cauliflower
4-6 cloves garlic
1/3 cup diced onion
1/2 tsp minced fresh sage
1/2 tsp ground fennel
1/2 tsp crushed red pepper flake
1/2 tsp green or red lentils, rinsed
juice of one lemon
2 cups low-sodium vegetable broth
salt and pepper
1 tbsp coconut oil or grass-fed butter
Chopped parsley
chili oil or olive oil (optional)
thin lemon slice (optional – for garnish)

Cut each cauliflower head in half lengthwise through the stem (to hold the entire “steak” together). Cut each half again in the same direction so that you get 1″ thick slices. The ends may break apart – which you can just roast with everything else or save for another dish later.

Saute garlic, onion, sage, fennel, red pepper flakes, and lentils with the coconut oil or butter over medium heat for 3 minutes in a medium saucepan until fragrant. Add vegetable stock and bring mixture to a boil over high heat for 1 minute. Reduce heat back to a simmer. Cook covered for 45 minutes or until lentils are very soft. If you lose a lot of water from the boiling process, add more water to keep it loose.

Once the lentils are tender, remove the saucepan from heat and cool for 5 minutes. Blend the mixture in an immersion (“stick”) blender or a regular blender. During this blending process add salt and pepper to taste. Also add the lemon to taste (usually 1 tablespoon of lemon juice should do it).

Heat the grill on high or set your broiler to high with the rack at the top most position. Place the cauliflower “steaks” on the grill and cook each side for 5 minutes until the “flowers” have a nice char to them. Remove to a plate and cover to finish cooking. If using an oven, place “steaks” in a baking sheet and broil for 5-7 minutes until edges have similar char. Remove and rest for 5 minutes to finish cooking process.

Carefully plate one “steak” on a plate. Add a ladle of the lentil sauce. Top with parsley, a dash of sea salt, fresh cracked pepper, and chili or olive oil drizzle.

Roasted Cauliflower, Kale, and Miso “Grits”

What to do with a bunch of left over miso paste? If you have some cauliflower laying around, make some gluten-free, grain-free, paleo-friendly “grits”.

Picture by Flickr user danuv.

Picture by Flickr user danuv.

2 tbsp coconut oil
1 head cauliflower in 2″ pieces, greens removed
1 cup finely chopped kale
4 large garlic cloves (whole)
1 sm (or 1/2 large) onion – chopped.
3 tbsp Miso Paste
2 cups vegetable broth (low sodium)
salt and pepper to taste

Set broiler on High. Arrange cauliflower on a baking sheet in one even layer. Roast until tips are brown and steam is produced. Take out of oven and set aside to cool slightly. Heat 2 tbsp of coconut oil in a stock pot or large saucepan. Sautee onion and garlic until fragrant or until garlic cloves are slightly . Add kale and roasted cauliflower and saute for 3 mins until cooked. Add 2 cups vegetable broth and 3 tbsp miso paste. Stir until completely mixed. Simmer for another 5 mins. Add any additional seasoning if needed (I found I didn’t need any more). Add tons of black pepper. Blend everything in an immersion blender or in a normal one. Should be the consistency of loose grits. Add more stock if you need it to be thinner. Or you can set the pot on a low heat and evaporate any additional water if it’s too thin.

Slow Cooker Sesame Chicken

Today we tried this recipe from Just A Taste and it is hands down our favorite slow cooker meal. Why? Because it doesn’t taste like it came from the slow-cooker! It is 80% “set-it-and-forget-it” since the last few steps do require a separate pan. But it’s so worth it.

Picture by Flickr user wintersoul1.

3 large bone-in, skinless chicken breasts (2 1/2 to 3 pounds total)
1/2 cup honey
1/2 cup low sodium soy sauce
1/4 cup blackberry jam
1/4 cup hoisin sauce
2 Tablespoons olive oil
3 cloves garlic, minced
1/2 cup diced onion
1/4 teaspoon crushed red pepper flakes (optional)
1 Tablespoon cornstarch
Sliced scallions, for garnish
Sesame seeds, for garnish

Arrange the chicken breasts in the slow cooker so that they are not overlapping.

In a medium bowl, whisk together the honey, soy sauce, blackberry jam, hoisin, olive oil, garlic, onion and crushed red pepper flakes, and then pour the sauce over the chicken. Cover the slow cooker and cook the chicken on LOW for 4 to 5 hours until the chicken is fully cooked.

Using tongs, remove the chicken from the slow cooker (reserving the liquids) and place it on a cutting board. Remove the bones then use two forks to shred the chicken into smaller pieces. Place the shredded chicken in a large bowl.

In a small bowl, whisk together the cornstarch with 3 tablespoons of cold water to make a slurry.

Transfer the liquids from the slow cooker into a small saucepan set over medium-high heat and whisk in the slurry. Bring the sauce to a boil and cook it until it reduces and has thickened slightly, about 3 minutes. Pour enough sauce over the chicken to cover (you won’t use all of it), tossing to combine. Serve the chicken topped with sliced scallions and sesame seeds.

NOTES:
Depending on the kind of chicken you get, you’ll end up with a LOT of sauce. You only need to use a little to cover the chicken as much as you want. You can use the remaining sauce later to marinade shrimp or salmon OR as dipping sauce for any other dish.

Whole Food’s Lemon Zip Juice

Picture by Flickr user Sarah Cairncross.

Whole Foods in Dublin, OH, sells fresh raw juice in various fruit and vegetable blends with cute names. Our winter fav is Lemon Zip. Anytime we feel a cold coming on we drink some Lemon Zip in the morning and our throat feels better throughout the day. It’s spicy, tart, sweet – and quite expensive. One 16oz bottle is $7! We’ve got a juicer, why not make some ourselves?

Whole Foods is wonderful at disclosing ingredients in their foods, but they won’t tell you the proportions. So after much trial and error, here’s what we got. A warning – if you drink this right away – it’s SPICY (but good). After a day in the fridge, the heat reduces quite a bit. That spicy chemical in peppers (called capsaicin) is proven to be natural anti-inflammatory (among other amazing properties). Great for sore throats and painful sinus pressure.

Throw the following items in order in your juicer set on high:

2oz whole ginger
~1oz Jalepeno (usually 1 whole jalepeno, stem removed)
1lb lemon (peeled, quartered – about 4 large lemons)
2lb green grapes (removed from stem)
6 cups cold filtered water

Store in a covered pitcher in the fridge. This is raw and fresh – so it may last only a week. Makes approx 64oz of Lemon Zip for roughly $9. At Whole Foods, the same amount would cost you $28!

Savory Red Cabbage Soup

Modified from a Prevention.com recipe, I added tons of black peppercorn and replaced the caraway seeds (because I didn’t have any) with cumin and fennel. Top this off with sliced avocado, or a poached egg, or some grilled turkey kielbasa, and you’ve got yourself a very hearty, very healthy meal.

1 tablespoon butter
1 large onion, diced
4 cloves garlic, roughly chopped
4 stalks celery, thinly sliced
1 lb red cabbage, thinly sliced
1/4 cup apple cider vinegar (or red wine vinegar)
2 tsp whole cumin seeds
2 tsp whole fennel seeds >> *if you don’t have whole seeds, just use 2 tsp each of cumin powder and fennel powder
1/2 tsp garlic powder
1/2 tsp cumin powder
1 carton 32 oz vegetable broth
1/2 cup organic ketchup OR 2 cans (6 oz) tomato paste
1 tbsp black peppercorn >> if you don’t have peppercorn, then 2 tsp ground pepper
1 can great northern, cannellini, or navy bean
4 stalks green onion (for garnish)
sea salt

Read more

Dairy-free Jeni’s Dark Chocolate Ice Cream

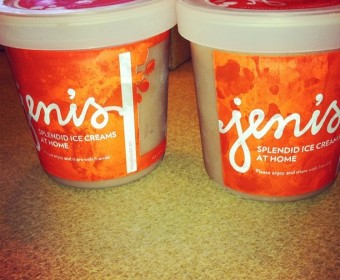
I am shocked how easy this was – but I also think having a year of learning how to make ice cream through Jeni Britton-Baur’s book helped me tremendously. There is a lot of science that goes into a great ice cream. Fat to water ratio, protein quantity, solubility properties of different kinds of sugar, temperature impact on water crystallization, all play into each perfect creamy spoonful.

But what if you can’t have dairy? Is there a vegan substitute? The coconut ice creams we tried are chock full of thickeners and natural flavors – and SO expensive. Full fat coconut milk should be the perfect base – but thanks to Jeni’s know how, I was able to use her tricks to ensure the coconut milk doesn’t freeze in chunks. The end result was a smooth, silky ice cream that melts slowly on your tongue and is very indulgent.

2 cans (13.5 oz) full-fat organic coconut milk
1 cup turbinado sugar
2 tbsp organic light corn syrup
2 oz (by weight) cocoa powder (roughly 1/2 cup by volume)
1 oz finely chopped dark chocolate (55% to 70% cacao)
1/8 tsp salt

In a medium sized mixing bowl, add the salt and the chopped dark chocolate, set aside. In a medium saucepan bring the coconut milk, sugar and corn syrup to a slow simmer for 5 minutes, constantly stirring. Slowly whisk in small amounts of the cocoa powder and simmer for another 3 minutes continually whisking until most of the cocoa is incorporated. Remove from heat. Pour small amounts of this hot mixture through a fine sieve/strainer (to strain out the undissolved cocoa) into the mixing bowl containing the chocolate and salt. Slowly whisk the chocolate and salt so that everything has melted. Continue pouring the rest of the hot mixture through the sieve into the mixing bowl. Whisk the mixture now in the mixing bowl well.

Pour this chocolate mixture into a gallon freezer ziploc bag. Place the bag in a large mixing bowl filled with ice and water. The idea here is to quickly reduce the heat of this mixture to almost near freezing. The colder this gets, the better the ice cream texture will be in the ice cream maker. This should take 20-30 minutes to cool down. Once cooled, pour this mix into the frozen container of your ice cream maker and spin for 20 minutes until the consistency of soft serve.

(For one batch, we added peppermint essential oil about 15 minutes into the spinning to give an awesome mint chocolate flavor. )

Store in small air-tight tupperware container in the coldest part of your freezer.

Breakfast Quinoa “Oatmeal”

Breakfast Quinoa "Oatmeal"
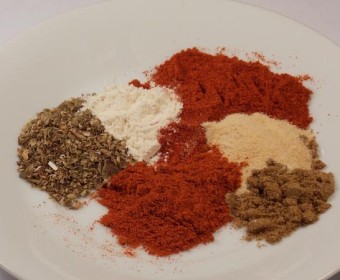
In our effort to wean ourselves away from gluten, the most difficult meal of the day is breakfast. Our last post about gluten-free pancakes is our first attempt. Today, we discovered (and slightly modified) a Martha Stewart recipe for breakfast quinoa. Now, quinoa is a seed and doesn’t give you that moist, soft, “porridge-y” quality that is so special about oatmeal. With the addition of flax seed flour and some coconut oil, we can turn a light ancient grain to a hearty breakfast fit for a cold autumn morning.

2 cups coconut milk (the stuff in the carton like “So Delicious”)
1/8 tsp salt
1 cup well rinsed uncooked quinoa (see below if you have left over cooked quinoa)
2 tbsp flax seed flour
1 tbsp coconut oil
1 tbsp honey
1 tbsp brown sugar

Optional toppings:

  • handful of your favorite dried berries
  • sliced banana
  • nuts (sliced almonds, walnuts, cashews)
  • almond or cashew butter (1 tbsp)
  • your favorite fruit preserves

In a small saucepan, bring the coconut milk and salt to a simmer and add the quinoa. Stir frequently over a slow simmer until quinoa looks swollen enough to see the little spouted “tail”. Turn the heat to low and add the flax seed flour. Stir until combined – give a few minutes to let the flaxseed absorb the liquid and thicken it. Add coconut oil, brown sugar, and honey; stir until dissolved. Serve in a bowl and top with favorite nuts, fruit, spread, etc.

If you already have cooked quinoa: You’ll need about 1.5 cups of cooked quinoa to follow the proportions of the other ingredients in this recipe. Since it’s already cooked, you can reduce the coconut to 1 cup. Combine the milk and cooked quinoa in a saucepan heat to a very low simmer. Add the flaxseed and follow the rest of the instructions above.